1. Get Port
Port is a desktop GUI application that allows you to spin up, access, and manage your Urbit ships without any knowledge of the command line or Urbit binary.
- MacOS
- Linux
- Windows
To install Port on MacOS, simply download and open the .dmg file.
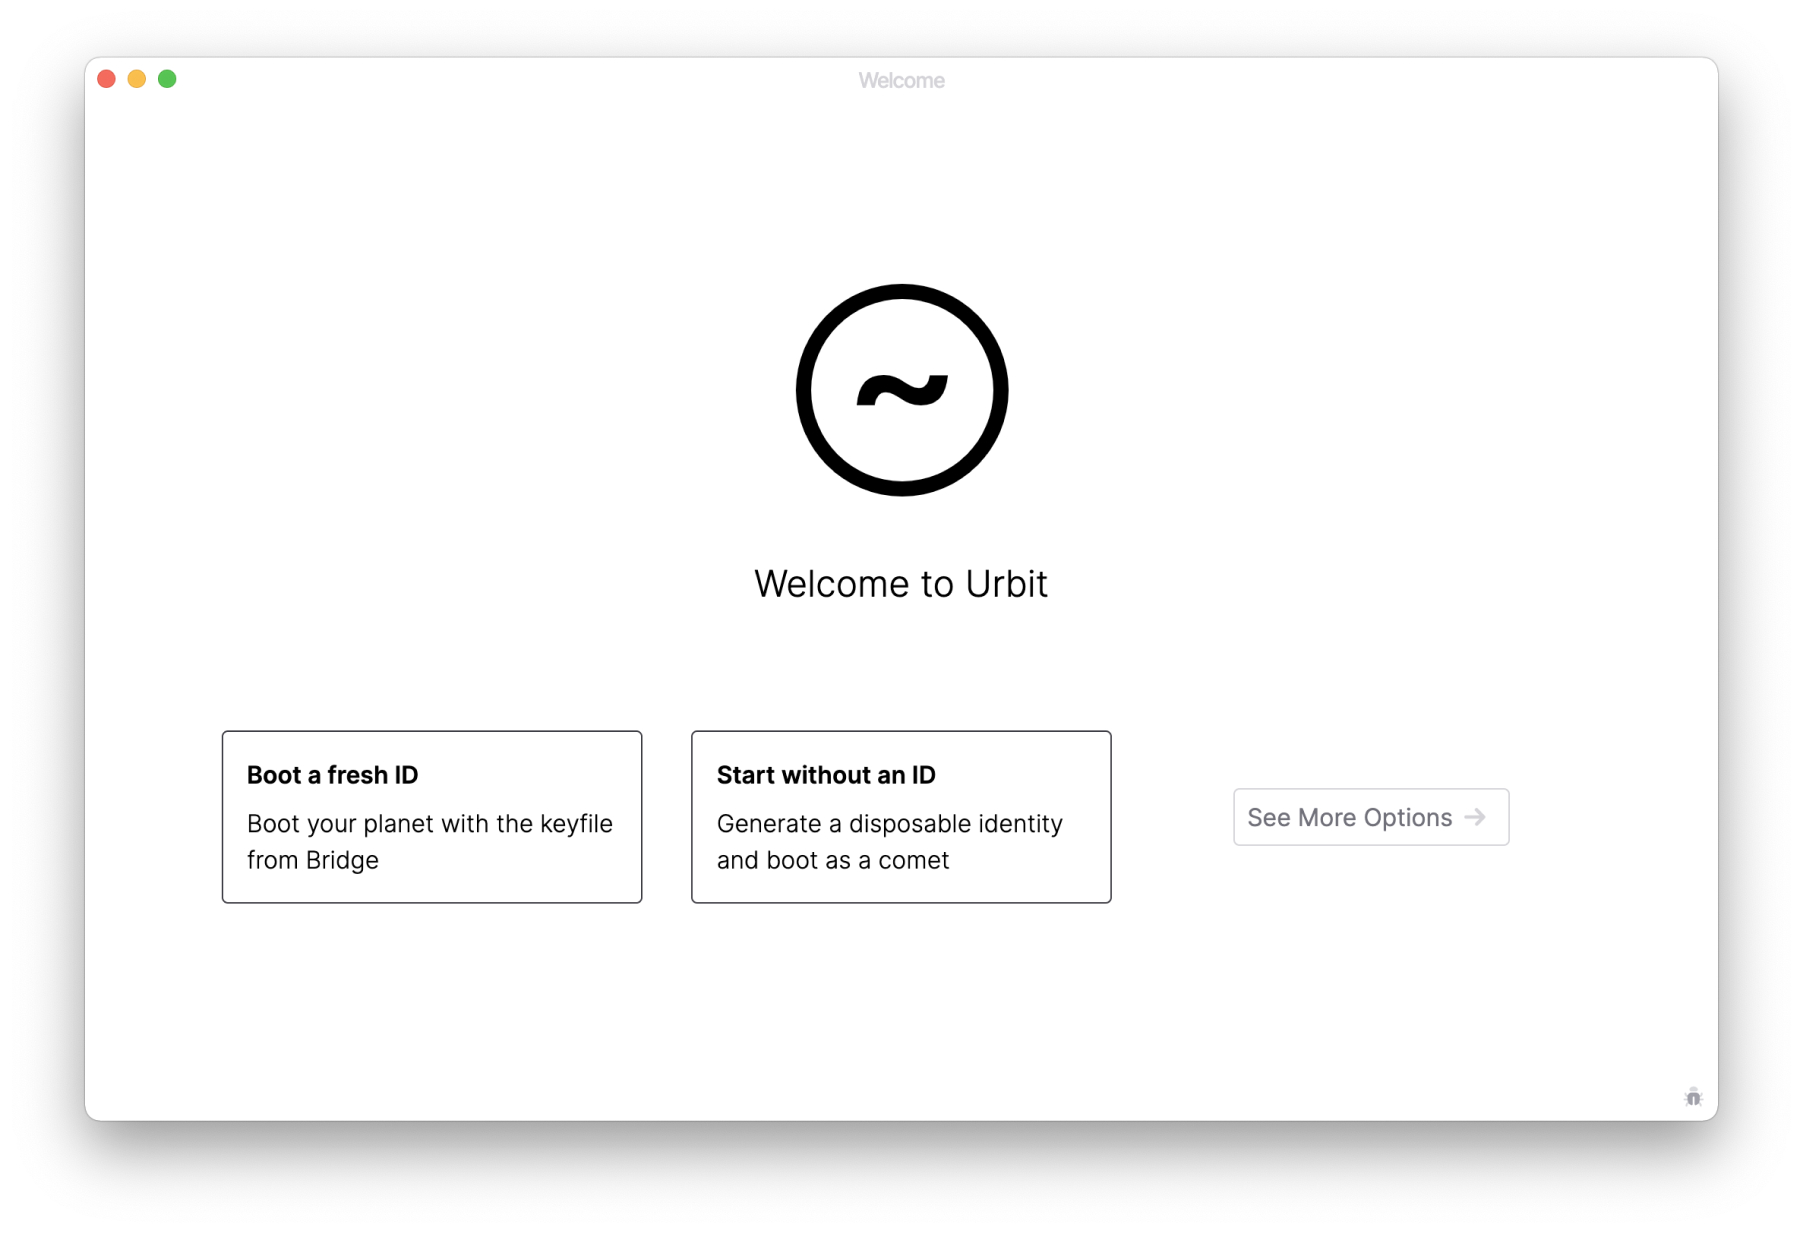
2. Boot a comet
A comet serves as a temporary identity for the network. It works just fine for checking out the network, but to download applications and get the full functionality of Urbit ID you’ll need a to get a planet.
Start Port and hit the Start without an ID button. It'll take a few minutes to spin up the new comet.
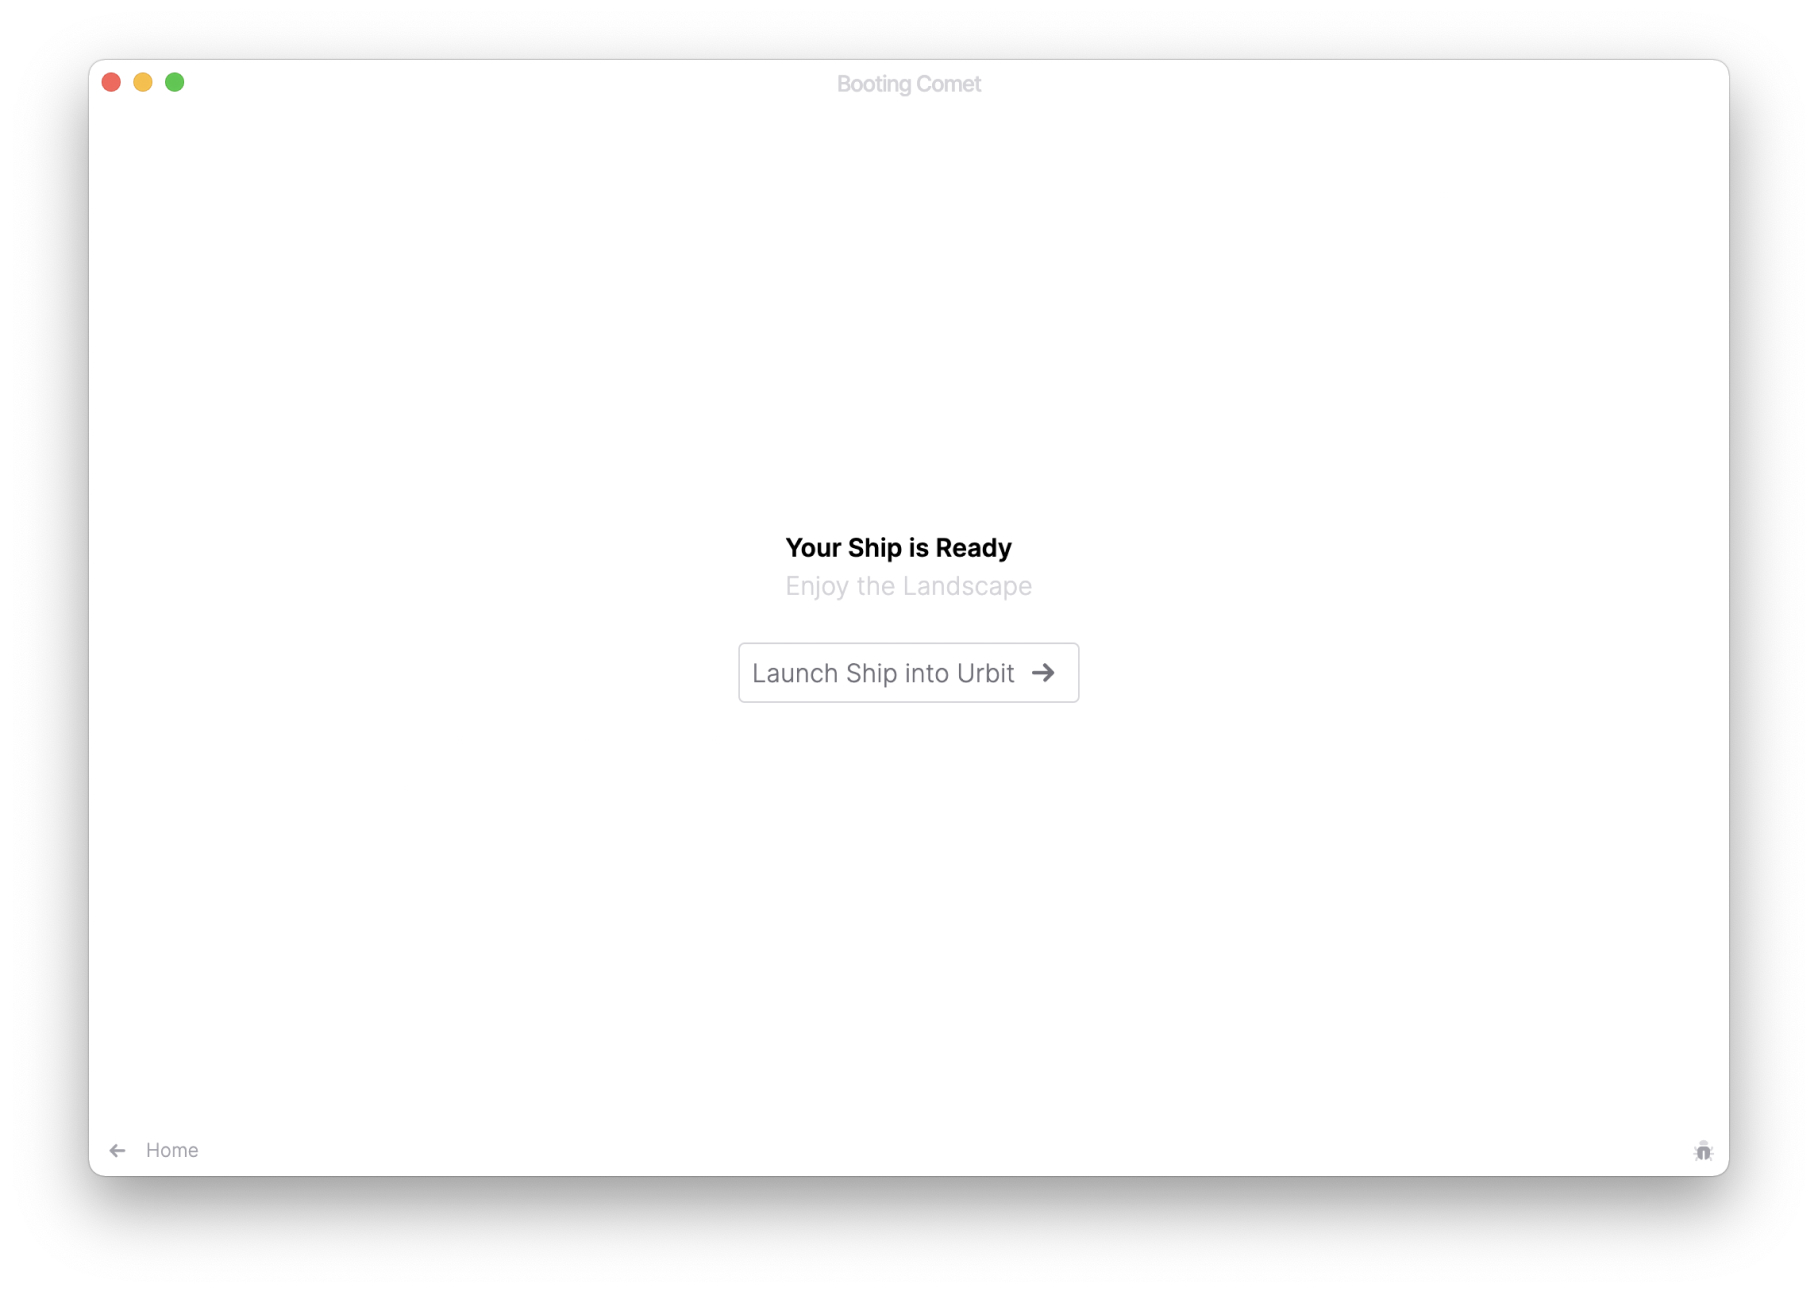
3. Launch your ship
Once that's finished, click Launch Ship into Urbit and you'll be on the network.
Want to combine the simplicity of Port with a permanent Urbit ID?
If you already have a planet, first get your keyfile. Start Port, click the Boot a fresh ID option. Give your ship a name, and in the Shipname field, enter your planet name, like ~sampel-palnet. For the Key File field, browse to the keyfile, select it, and hit Continue.
Port will boot your Urbit in a few minutes!
For more information on getting a planet, see our Getting an Urbit ID guide.
Next steps
Learn how to get around your urbit.